Create an Invoice — Web Backoffice
Card Not Present › Invoicing › Create Invoice — Web
Generate a professional invoice with line items, VAT, and a built-in payment link
Navigate to: Merchant Backoffice → Merchant Invoice → Invoice (Generate Invoice tab)
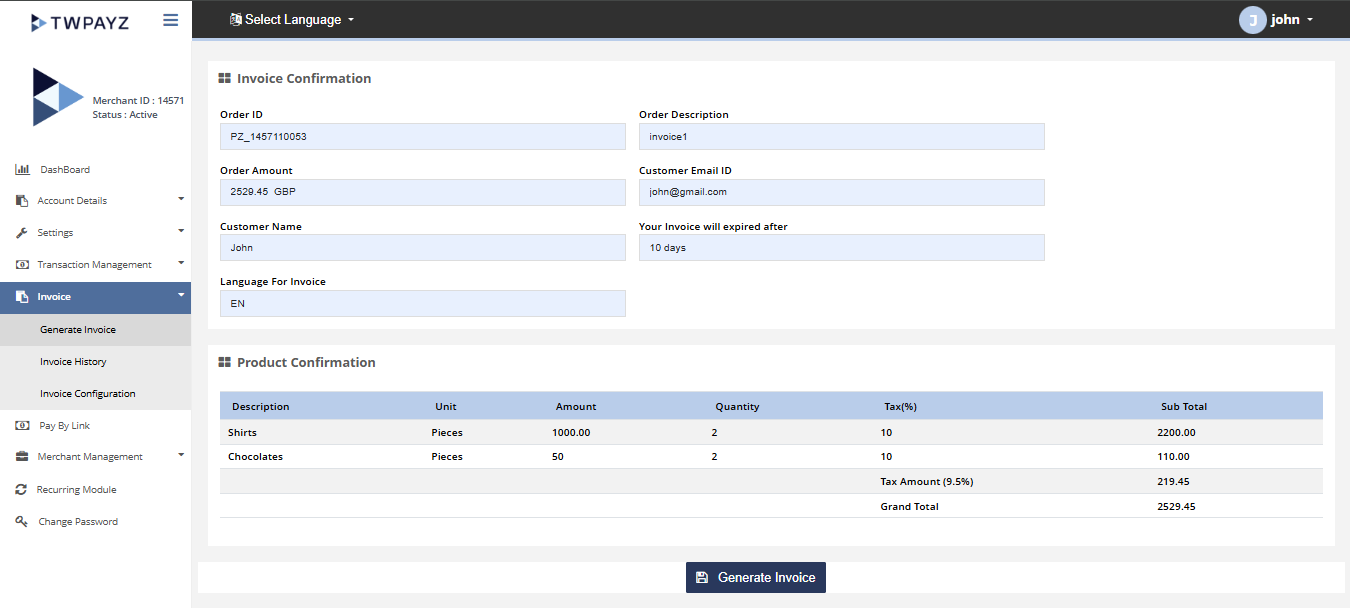
Step 1 — Customer Details
| Field | Required | What to enter |
|---|---|---|
| Customer Name | Yes | Full name of the individual or business being invoiced. |
| Customer Email | Yes | The invoice and payment link are delivered to this email address. The customer receives a professional email with PDF attached and a Pay Now button. |
| Customer Phone | Optional | Stored against the invoice for your reference. |
| Currency | Yes | Defaults to your configured default. Change if invoicing in a different currency. |
| Order ID | Optional | Your internal reference if you want to cross-reference with your own order system. |
Step 2 — Line Items
Add each product or service as a separate line item. Click Add Item to add more lines. Click the delete icon on a line to remove it.
| Field | What to enter |
|---|---|
| Description | Name or description of the product or service (e.g. "Website Design — July 2026", "Consultation Hour", "Product X × 3"). |
| Quantity | Number of units. Use decimals for partial units (e.g. 1.5 hours). |
| Unit Price | Price per unit excluding VAT. The system calculates VAT on top. |
| VAT Rate (%) | VAT percentage for this line item. Defaults to your configured rate. Change per item as needed (e.g. 0% for VAT-exempt items in the same invoice). |
Automatic VAT calculation: Line Item Total = Quantity × Unit Price × (1 + VAT Rate ÷ 100). The totals box updates in real time.
Step 3 — Review and Submit
Review the totals box: Subtotal (ex-VAT), Total VAT, and Grand Total. Add any optional notes in the Notes field (these appear at the bottom of the PDF invoice).
- 1Verify all customer details, line items, and totals are correct.All correct.
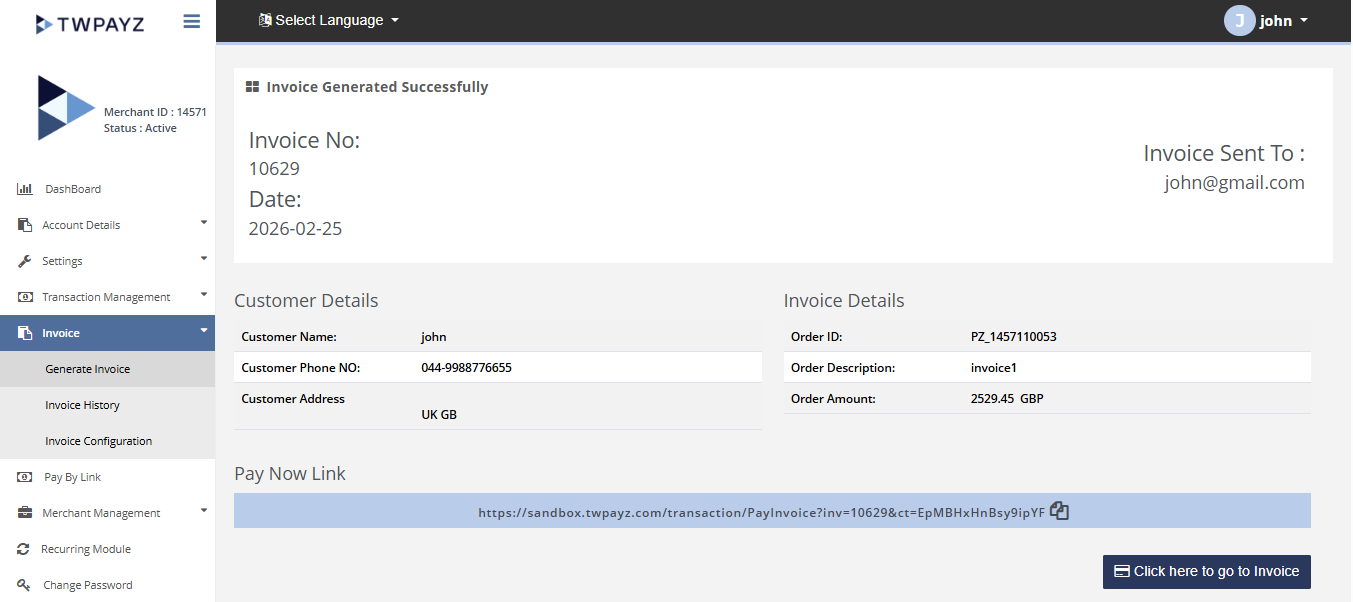
- 2Click Submit.Invoice generated and emailed to customer. Invoice ID assigned (e.g. INV-047). Status set to Unpaid.
The invoice remains active (customer can pay) until the expiration period you configured in Invoice Configuration. After expiry, the payment link becomes inactive and the status changes to Expired.