Transactions — Castle S4
Card Present › Castle S4 › Transactions
Purchase, pre-authorisation, keyed entry, MOTO, refund, and void — all transaction types explained
Purchase
A standard sale transaction. Funds are authorised and captured in a single step.
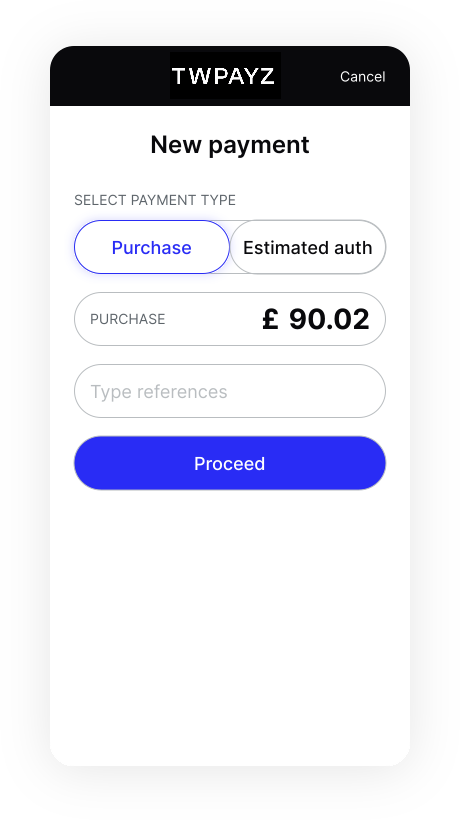
- 1From the TWPayz POS home screen, tap Purchase.Amount entry screen opens with numeric keypad.
- 2Enter the transaction amount. Confirm the amount shown is correct.Amount is displayed clearly on screen.
- 3Confirm the amount. The terminal prompts the customer to present their card."Please present card" instruction appears on screen.
- 4Customer taps (contactless) or inserts chip card. For chip, customer enters PIN when prompted.Terminal contacts card network. Response received in 1–5 seconds.
- 5Wait for the result. Do not remove the card until the terminal instructs.Approved: green screen / Declined: decline reason displayed.
- 6Select receipt option: Print, or No receipt.Receipt prints or transaction completes without receipt.
Pre-Authorisation
Reserve funds on a customer's card without immediately capturing them. The card is checked and funds are ring-fenced — no money moves until you complete a Final Capture. Used for hotels, car hire, event deposits, and other scenarios where the final amount may differ from the initial estimate.
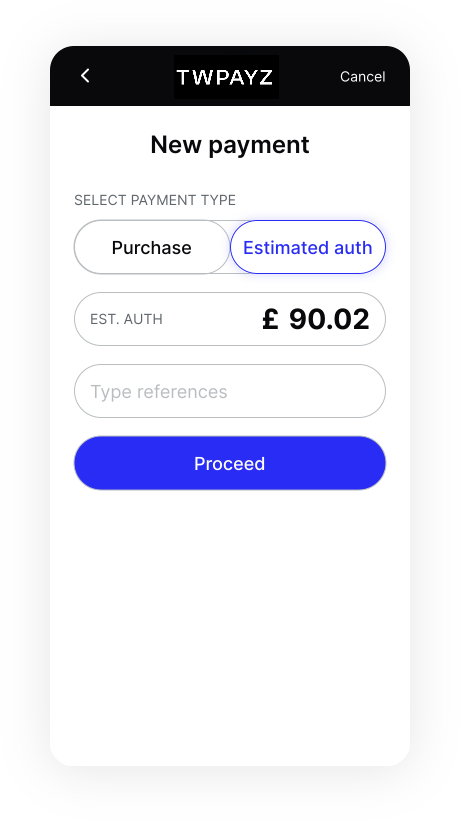
- 1Tap the menu icon (top-left of home screen). Select Pre-Authorisation.Pre-auth amount entry screen opens.
- 2Enter the estimated amount to reserve. Confirm.Terminal prompts for card.
- 3Customer presents card. PIN entered if required.Authorisation code displayed. Funds are now reserved on the customer's card.
- 4Note the authorisation code or print a receipt — you will need this for Final Capture.Pre-auth transaction appears in Transaction History.
Final Capture
Complete a pre-authorisation and collect the funds.
- 1Tap the menu icon. Navigate to Transaction History. Locate the original pre-auth transaction.Pre-auth record showing original amount and date.
- 2Select the pre-auth record. Tap Capture.Capture amount entry screen opens, pre-filled with the original pre-auth amount.
- 3To capture the full amount: confirm. To capture a partial amount (e.g. shorter stay, fewer items): clear the amount and enter the lower figure.Capture submitted. Funds settle to your account on next settlement run.
Incremental Authorisation
Add to an existing pre-authorisation without needing the customer's card again. Used when the final amount exceeds the original estimate (e.g. extended hotel stay, additional charges added to a tab).
- 1Locate the original pre-auth in Transaction History. Tap Increment.Increment amount entry screen opens.
- 2Enter the additional amount to add (not the new total — just the increment).New total reserved amount is displayed for confirmation.
- 3Confirm. No card presentation required.Updated reservation amount shown. Final Capture can be performed for the new total.
Keyed Entry
Manually enter card details when the physical card cannot be read. This is a last resort — only use it when chip, contactless, and swipe have all failed.
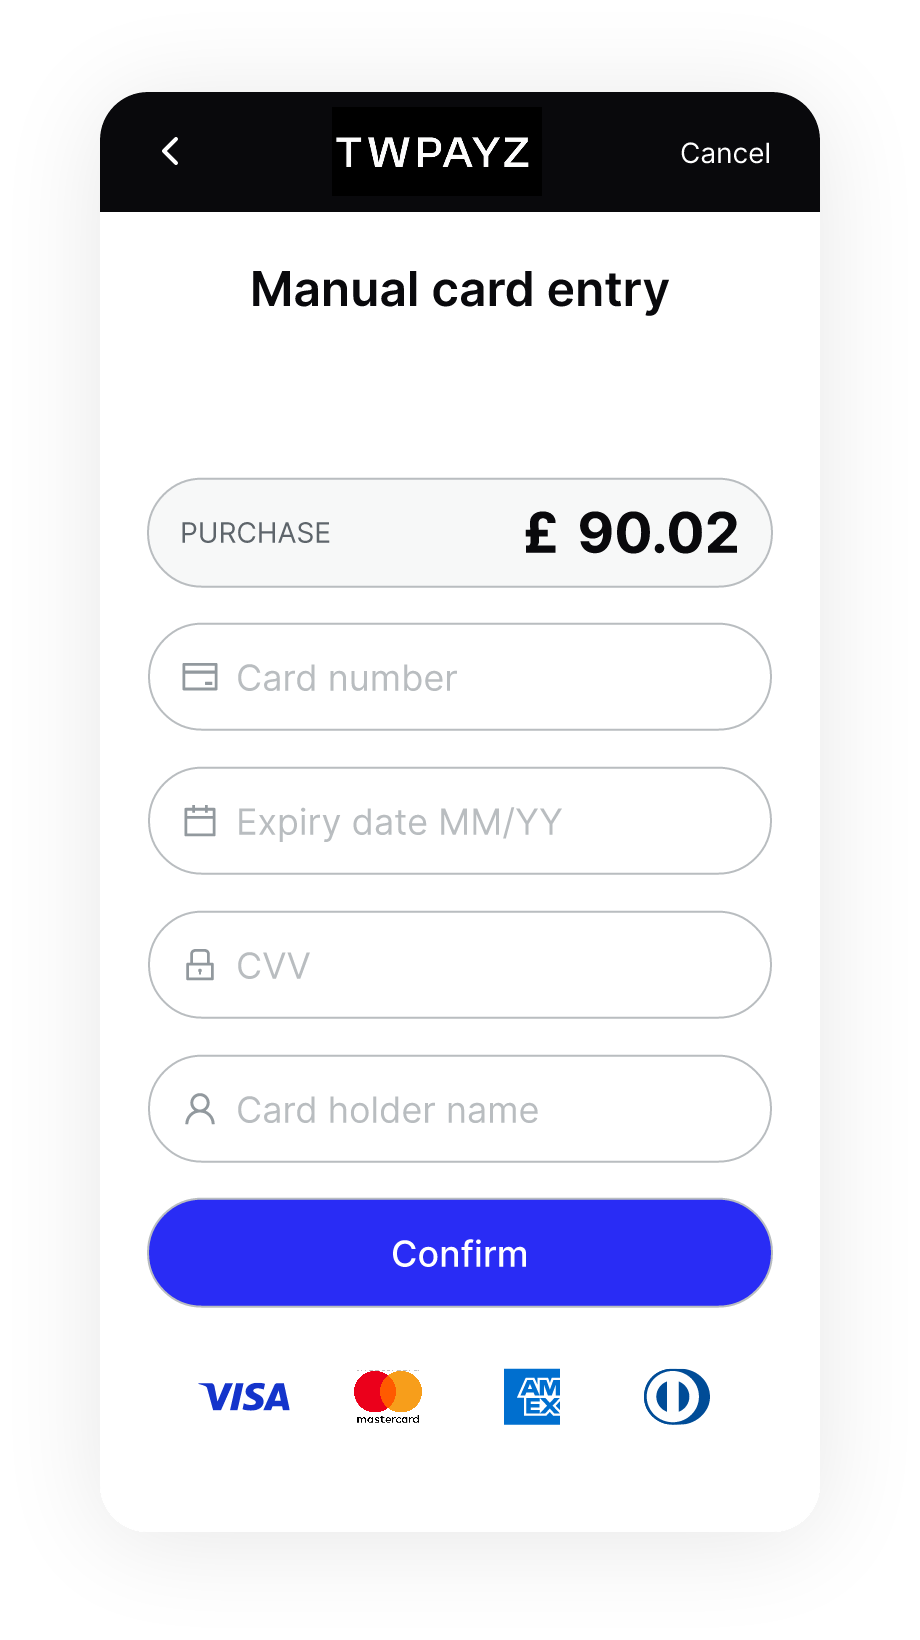
- 1From the home screen, tap Keyed Entry.Manual card entry form opens.
- 2Enter amount, then the 16-digit card number (auto-formats with spaces), expiry date (MM/YY), CVV (3 or 4 digits), and cardholder name.All fields populated.
- 3Tap Submit.Transaction processed. Result displayed within a few seconds.
MOTO (Mail Order / Telephone Order)
Accept card payments from customers who are not physically present — taken over the phone or via mail order. MOTO requires specific permission to be enabled on your account.
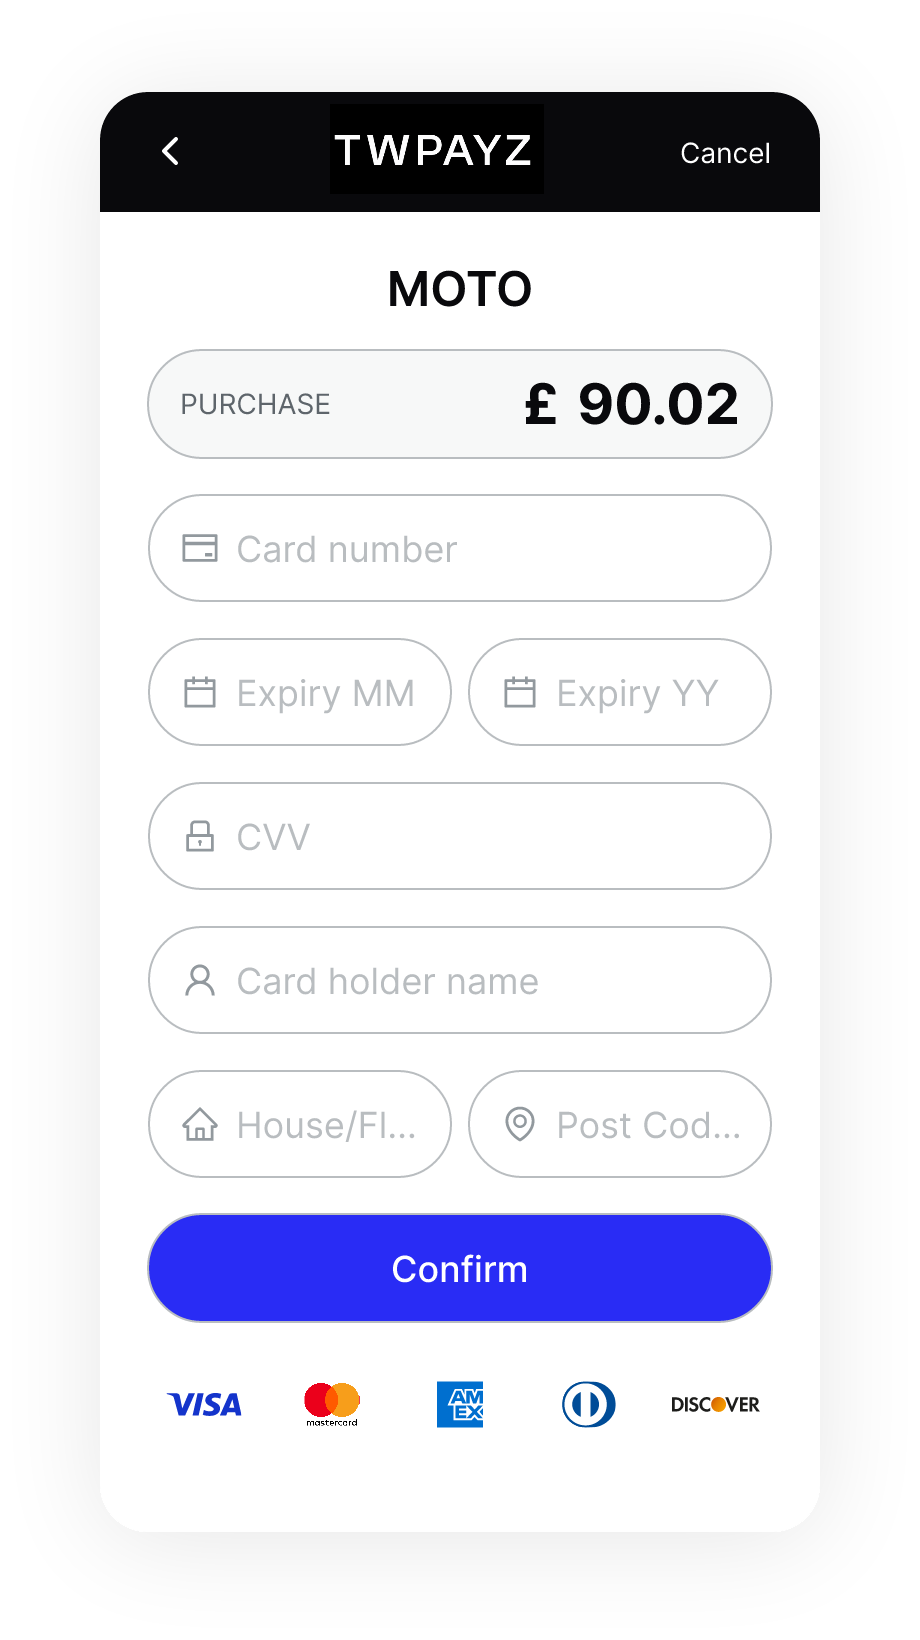
- 1From the home screen, tap MOTO (visible if enabled on your account).MOTO entry form opens.
- 2Enter: transaction amount, card number, expiry date, CVV, cardholder name. Optionally enter billing postcode for AVS (Address Verification — reduces chargeback risk).All fields populated.
- 3Tap Submit.Transaction processed. Approved or declined result displayed.
Refund
Return funds to a customer for a previous transaction. The customer's card must be present for verification.
- 1Tap the menu icon. Select Refund.Refund search screen opens.
- 2Locate the original transaction by date, amount, or reference. Tap the record.Transaction details displayed.
- 3Select Full Refund or enter a specific amount for a Partial Refund. Confirm.Terminal prompts for customer card.
- 4Customer presents the original card used for the purchase. Card is verified.Refund authorised and submitted. Funds returned to customer's card within 3–5 working days.
Void
Cancel a transaction before it is settled — no funds will move. Void is only available within the same trading day (before end-of-day settlement runs). After settlement, use Refund instead.
- 1Tap the menu icon. Go to Transaction History. Locate the transaction.Transaction record displayed with Void option available if not yet settled.
- 2Tap Void. Confirm when prompted.Transaction voided. Status updated to Void. No funds move.