Card Present › PAX A920 Pro › Hardware Overview
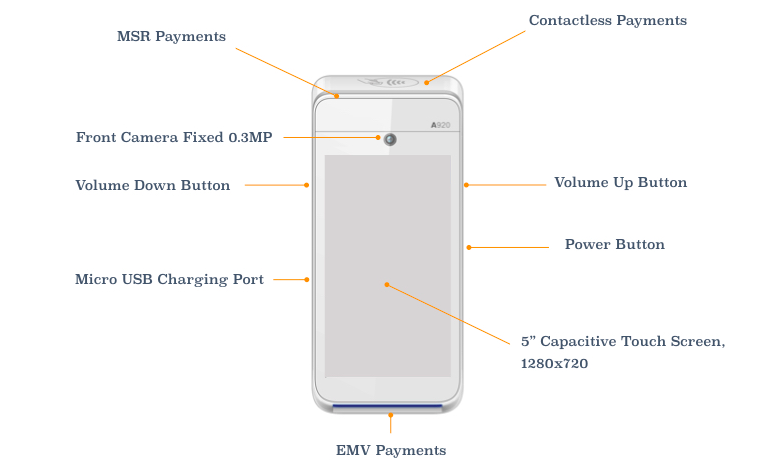
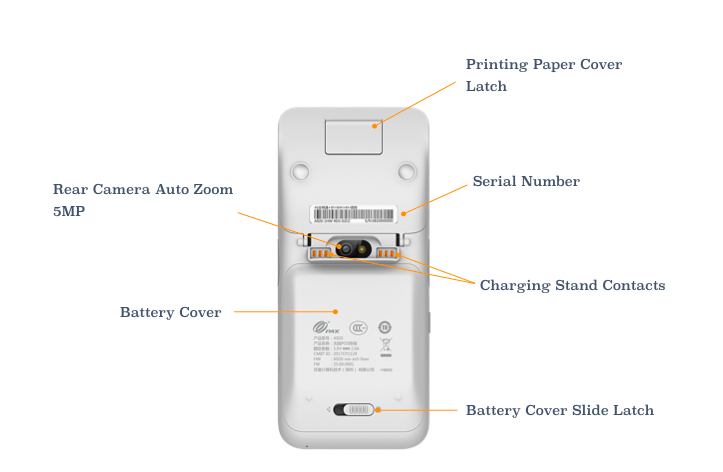
A labelled guide to every button, port, and card reader on the terminal
Front Panel
| Component | Location | Function |
|---|
| Touchscreen display | Centre | Main interface for entering amounts, navigating menus, and viewing transaction results |
| Chip card slot | Bottom edge | Insert chip card for Chip & PIN transactions |
| Magnetic swipe slot | Right side | Swipe legacy cards that have no chip |
| NFC / contactless zone | Centre of screen | Tap card or mobile wallet here for contactless payments |
| Power button | Right side | Hold 2–4 seconds to power on/off; short press = wake screen |
| Function keys | Below screen | Confirm (green), clear (yellow), cancel (red) |
Back Panel
| Component | Location | Function |
|---|
| Thermal printer | Top of device | Prints customer and merchant receipts automatically after each transaction |
| Battery cover | Full back panel | Slide latch to open; houses battery, SIM and SD card slots |
| SIM card slot | Inside battery compartment — SIM1 slot, left side | Holds the TWPayz SIM for 4G connectivity |
| SD card slot | Inside battery compartment | Reserved — do not insert or remove |
Ports
| Port | Location | Use |
|---|
| Micro-USB charging port | Left side | Charging only — connect the supplied cable |
LED Status Indicators
| LED colour | Meaning |
|---|
| Solid green | Charging complete / fully charged |
| Flashing amber | Charging in progress |
| Red (brief flash) | Low battery warning |
| No light | Device off or battery too low to charge indicator |