Connectivity
Card Present › PAX A920 Pro › Connectivity
Connect to Wi-Fi or activate your 4G SIM for internet-anywhere payments
The PAX A920 Pro supports two internet connection methods: Wi-Fi and 4G/SIM. You need internet connectivity to process payments. Once the TWPayz SIM is activated, the terminal will work on 4G independently — you no longer need Wi-Fi for daily use.
Option A — Connect to Wi-Fi
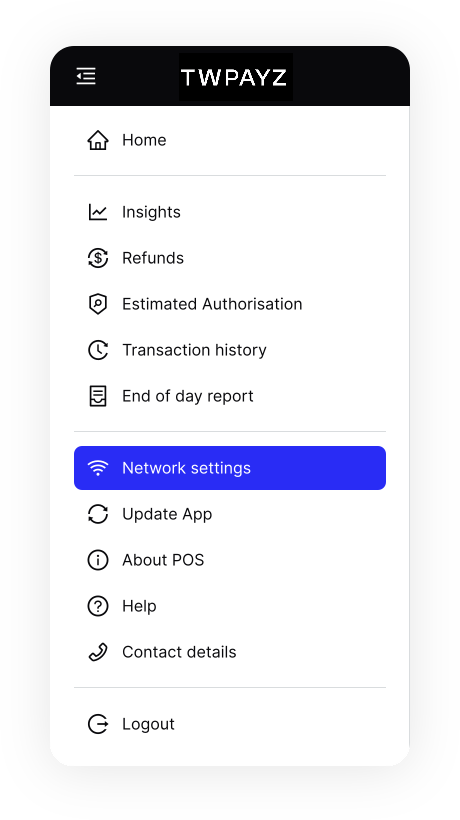
- 1On the terminal home screen, place your finger at the very top of the screen and pull fully downward to open the Android settings bar.A quick-settings tray slides down with icons for Wi-Fi, brightness, etc.
- 2Tap the Wi-Fi icon to open Wi-Fi settings.Wi-Fi settings screen opens, showing available networks.
- 3Toggle Use Wi-Fi to ON if not already enabled.Terminal scans and lists available networks.
- 4Tap your network name. If the settings screen asks for a password before showing networks, enter:
9876@@or9876(Android device passcode — not your Wi-Fi password).Your Wi-Fi networks appear in the list. - 5Tap your Wi-Fi network name, enter your Wi-Fi password, and tap Connect."Connected" appears below your network name. Wi-Fi icon appears in the status bar.
- 6Press the physical back button or swipe up to return to the home screen. Open the TWPayz Payments app.App loads and you can begin processing payments.
Option B — Activate the TWPayz 4G SIM
The TWPayz SIM card may already be installed in the terminal when you receive it. Complete Wi-Fi setup first, then activate the SIM. Activation requires a one-time internet connection — after activation, the terminal works on 4G alone.
Check / Install the SIM
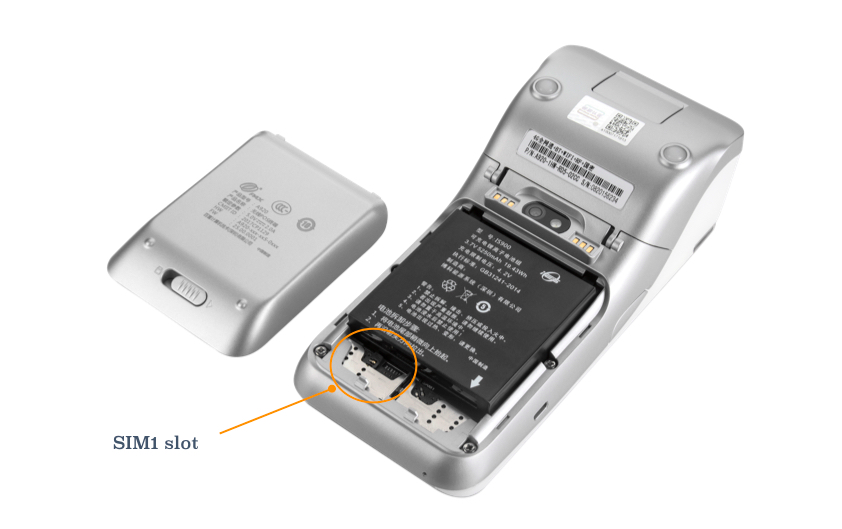
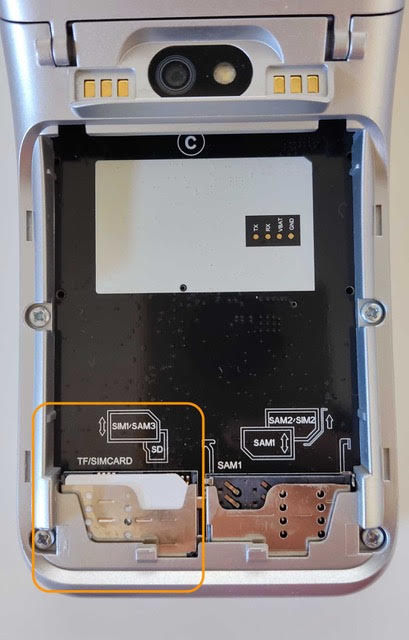
- 1Open the battery compartment (follow battery removal steps in the First-Time Setup guide).SIM slots are visible inside the compartment.
- 2Locate the SIM1 slot (left side of the battery compartment). Check whether a SIM card is already present.If a SIM is already there, you can skip to Activation below.
- 3If installing: slide the SIM card (gold contacts facing down, notched corner first) into the SIM1 slot until it clicks.SIM sits flush in the slot.
- 4Re-insert battery and close cover. Power on the terminal.Terminal boots normally.
Activate the SIM
- 1Connect to Wi-Fi (required for one-time activation — see Option A above).Wi-Fi connected confirmed.
- 2Open the TWPayz Payments app from the home screen.App home screen loads.
- 3Tap the Settings icon (cogwheel, usually top-right or bottom of screen).Settings menu opens.
- 4Scroll down and tap "Activate SIM card".Activation progress bar appears. This takes 30–90 seconds.
- 5Wait for the confirmation message: "SIM card activated successfully."4G signal bars appear in the Android status bar. Wi-Fi can now be disabled for daily use.
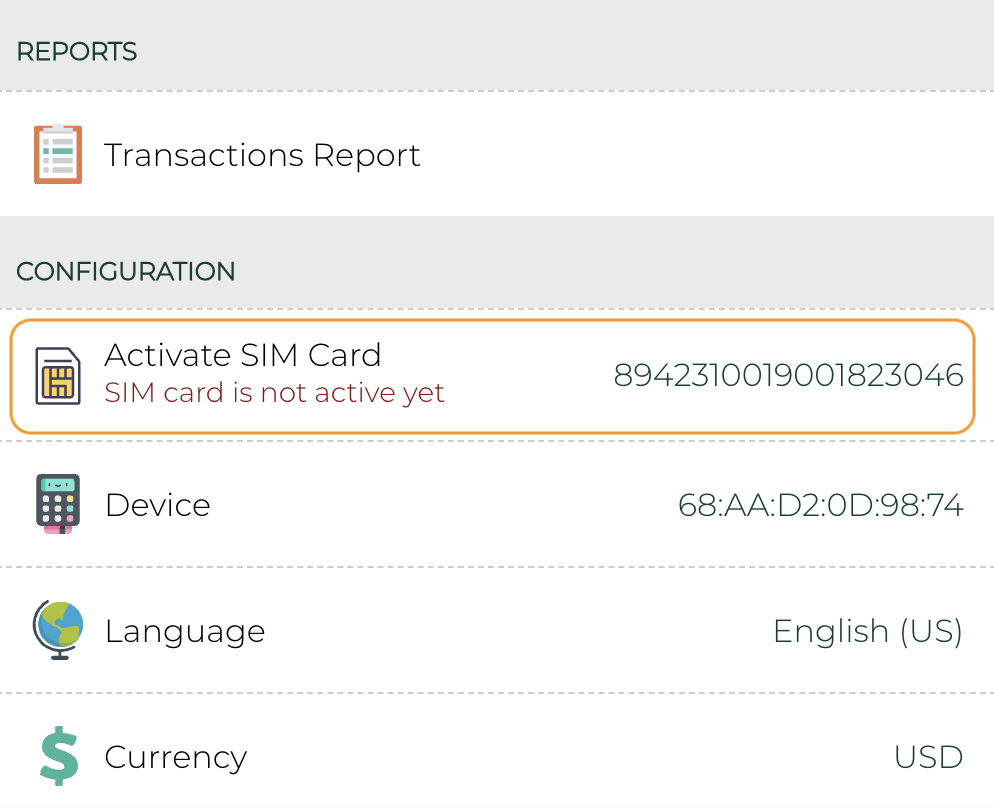
If "Activate SIM card" does not appear in Settings: ensure you are connected to Wi-Fi, fully close and reopen the app, and try again. If still missing, contact TWPayz support — your account may need SIM activation permission enabled.