Creating an Invoice
A three-step guided flow
Tap Invoice on the Home screen or the Invoices tab to start. A progress bar across the top tracks you through three steps: Customer, Items and Review.
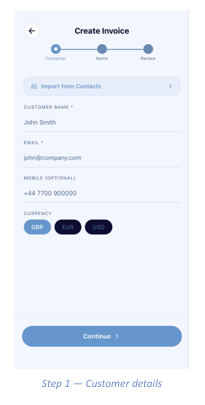
Step 1 — Customer
- Tap Import from Contacts to pull details straight from your phone, or type them manually.
- Enter the Customer Name (required).
- Enter the customer’s Email (required) — this is where the invoice is sent.
- Optionally add a Mobile number.
- Choose the Currency: GBP, EUR or USD.
- Tap Continue.
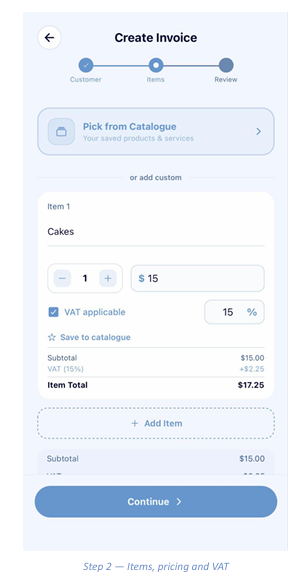
Step 2 — Items
- Tap Pick from Catalogue to insert a saved product or service, or scroll to or add custom to enter one by hand.
- Type the item description, for example a product name.
- Set the quantity using the minus and plus buttons.
- Enter the unit price in the price field.
- Tick VAT applicable and set the rate if tax applies. The item’s subtotal, VAT amount and total update instantly.
- Tap the star beside Save to catalogue to reuse this item on future invoices.
- Tap + Add Item to add more lines, then Continue.